Wednesday, December 28, 2011

OEM MacCat Winter Tarp


I have written previously about the fact that I enjoy laying in a hammock and often bring a hammock with me on day hikes where I'm less concerned about pack weight.

Hammocking to me is strictly for relaxing as I simply can't sleep in them.  I don't know why, but I've just never been successful even though I'm comfortable.  Truth be told, otherwise I think they are a great idea and very practical for the areas where I hike.  As previously mentioned, I've owned and/or tried just about every hammock on the market and ultimately had a custom 11" Traveler made by Brandon Waddy with Warbonnet Outdoors (www.warbonnetoutdoors.com).

After having it for several months now, I decided I wanted to have a tarp because often I like hanging in my backyard in poor weather and would like the option of the same if I choose to carry it with me hiking.  I didn't need anything terribly fancy or overly weight conscious, but I did want something made well and potentially useful for other activities.

Being that I didn't already own a rectangular tarp, I wanted something where I could fold in the ends to work as doors in situations where I was exposed to blowing snow or rain.  I wanted something made of silnylon as I didn't need anything more expensive.  I went with the largest option I could find considering the size of my hammock - a 10'x12' Winter Tarp by Outdoor Equipment Supplier (http://www.outdoorequipmentsupplier.com/).  It was $135 and came in at 19.5oz.

I've owned a couple of tarps from OEM and each product was simply superior.  If you're looking for a manufacturer who doesn't cut corners, has properly engineered designs, uses solid fabric with competant manufacturing techniques, and who treats customers right - OEM is a great option.


I met Brian MacMillin, the owner of OEM several times over the years at Trail Days in Damascus VA.  Brian has a great story.  An Eagle Scout who simply wanted better gear, he started OEM while working on his B.S. in Mechanical Engineering.  He is now a graduate student and working on the technolgies and philosphies that directly relate to his business (waterproof fabrics, how materials impact design, etc.).  Fascinating stuff.

There isn't too much about the tarp I can say that I haven't already implied.  It's a wonderful piece of gear with reinforced tie-outs that form doors nicely around my uncustomary 11' custom hammock.  I've been in a couple driving rains and came away without any dampness whatsoever.  It is really refreshing to be so protected and so comfortable.  Having color options is a nice choice and the more robust nature of the manufacturing is perfect for hammocking.  I sold a Warbonnet Outdoors Big Mamba Jamba for this option as I felt OEM offered a product that worked better for my needs.

Wednesday, December 21, 2011

Tall Guy Redesign of Six Moon Designs Lunar Solo (and Some TIPS)


As a vocal blogger about backpacking resources available for big/tall people, I often get asked about gear selections by others who are in a similar position.  Truth be told (and not something I’m proud of because shipping costs are expensive), I’m actually a pretty good reference for these question because I’ve unintentionally tried a LOT of gear in my own plight.

Several years ago when looking for my first lightweight solo tent, I tried out the Lunar Solo by Six Moon Designs.  Trail Days in Damascus offers a wonderful opportunity to try out this kind of gear without wasting money on shipping.  At that time, my first thought was that it was smartly designed and made in the same spirit as other great SMD products.  My second thought after trying to stretch out in it was that it was too short and didn’t have enough headroom.  As a result, I ended up purchasing the Tarp Tent Contrail which was $35 cheaper and had more room.

The problem is that although I really like the TT Contrail, it is still too tight for me and I honestly hate getting in at the head end and wiggling down to the foot end.  Side entrance shelters with a center peak are far more preferable to me unless we’re talking tarps.

SMD apparently realized the gain of enlarging the SMD Lunar Solo and last Tuesday it was announced that the shelter had been redesigned.  The design for 2012 includes a floor length increase to 90”, and of equal notoriety, an increase to the height peak of 5” with a cantilever to offer even more headroom.  With the changes, the walls are now set vertically narrowing the tent and making it better at shedding weather elements.  A bathtub floor is also included but has been increased from 3” to 6”.  All of these changes were made…without gaining weight.  The new weight will be 23 oz or less offering 26 sq/ft of floor area and 8.5 sq/ft of vestibule area.

To be blunt, this is now a great option for everyone and I can’t wait to try it out myself.  Despite having a custom cuben tent which is lighter and more roomier, this is a great and more economic option that would be hard to pass up for thru-hikers and weekend warriors alike.

*********************************************************************************

IN OTHER NEWS....

I’m an avid reader of other blogs and backpacking webpages.  I truly hope you are too as there is a wealth of knowledge out there.  Even though backpacking as a whole could be described as putting one foot in front of the other and lugging some form of lifestyle necessities, I feel I can almost always learn something new if I look hard enough which will benefit my personal backpacking experience.

Many different websites are offering tips.  I should mention that some of the tips are largely well known or merely posted for some kind of editorial content (ahem, BPL). Awesome and reliable cottage manufacturer Gossamer Gear is now also offering tips, only I personally feel like their trips are quite worthwhile.  There were four that really got me thinking which I felt were worthwhile enough to re-post here:  

  1. The first was about using a woman’s nylon  stocking hose as a pre-filter when using Aqua Mira drops or other non-physical filter methods.  GENIUS!  I use a nylon bag meant for party favors or biodiesel bags which are a little heavy and expensive, but a nylon stocking is really a great idea that I had not previously considered and it weighs virtually nothing.  Giving credit where credit is due, this was a reprint from a GG Trail Ambassador’s blog named JERMM’S Outside.
  2. Glen VanPeski offered tips about successfully eating on the trail as a Vegan, but there are a lot of great ideas otherwise to include something I’ve only recently been trying which is Emergen-C, a supplement which, in this case, works wonders to prevent joint and muscle fatigue.  The whole article is really great.
  3. Lastly, Will Rietveld, formerly with BackpackingLight and whose opinion I’ve valued over the years, wrote an article about using nitrate-coated gardening gloves as a more robust glove for backpacking and bushwhacking.  The palm is coated to provide abrasion resistance and the rest of the glove is nothing more than spandex or some kind of synthetic which means breathable and quick drying.  BRILLIANT IDEA and at $5-7/pair for a variety of offerings available from your favorite home store, very affordable.
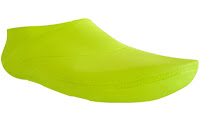
  4. The Gear Caster brought a new shoe product to my attention from Spanish vendor OneMoment (01M).  It is made from a natural 100% biodegradable plastic which uses a polymer injection molding technique that enables a 1 mm thickness for the shoe body with 2 mm for the sole.  Skin tight against your feet, the elastic material adapts to your own foot form over time.  Anti-slip soles provide a gecko like grip over slippery terrain. The biodegradable plastic is supposedly breathable so that you don't end up with a sweaty foot mess after starting your chosen outdoor activity.  Unique lightweight shoe option.


Wednesday, December 14, 2011

ACU Adventure Tech Soft Shell Pants


In the cooler months, I have a love affair with soft shell pants.  I have a couple pairs, but the one thing I don’t like is the fact that all the pockets are zippered.  Now this is great for someone who doesn't want to lose anything, but for me I just want to be able to stick my hands in my pockets without fumbling with a zipper or have it scratch me as I take my hand in and out.

Oddly enough, trying to find a pair of soft shell paints without zippered pockets wasn’t easy.  I’m not sure if this issue was because I was looking for big sizes, but I honestly had trouble finding options.  I ended up coming across the Adventure Tech (APCU Level V) softshell pants from ACU (www.acu.com).  This is essentially part of a cold weather system used by the military, although it is no thicker or warmer than any other soft shell pants I own.  Nowadays, the U.S. military gets some pretty good stuff based on quite a bit of solid science (although I don’t want to paint too broadly because many servicemen simply don’t get equipment adequate to perform under the conditions their leaders put them in).


Aside from the fact that pockets in these pants are accessible, the pants themselves are based on NanoSphere “self-cleaning” fabric promoted by Schoeller Dynamic.  For those readers familiar with Schoeller Dynamic, you are likely aware that this brand of fabric represents the top end of industry performance and is usually only available in the most expensive options. Search Arcteryx and you’ll get an idea of how much pants and jackets with this fabric cost.  NanoSphere technology is based on the principal of plants and the fact that plants never seem to be dirty.  This is relevant if you consider the fact that plants are outside 24/7 and never seem muddy or soiled.  The reason is because of their slick surface.  

Fortunately, these pants were only $95 which I consider to be right in the middle between an inexpensive and expensive option.  They aren’t the world’s greatest pants, as they are a little boxy, hand pockets aren’t very deep, and a couple extra belt loops would be nice, but they are a solid option especially for bigger folks.

For those of you who need clothing of a particular size that you're having a tough time finding, consider having your clothing custom constructed by Beyond Clothing (http://www.beyondclothing.com/).  They offer some truly wonderful options for people that can’t find clothing off the shelf in sizes they need.

Wednesday, December 7, 2011

Meet the JetBoil Sol Ti


When I first got into lightweight backpacking, I can honestly say I was a bit of an unintentional gear snob.  When I saw what others were carrying, I couldn’t imagine that they were making sound gear choices when there were so many other better options than what they were lugging around.  Whatever the piece of gear they had, for the most part anyway, I knew of a lighter option that probably performed just as well or better.  It was only after I caught a couple glances that I realized I had become “that guy” and realized that I was ruining some of the dynamics of backpacking by wiener measuring through gear comparisons.  I’m happy to report that I’m a bit wiser now and acknowledge that gear is a personal preference, cost and availability always plays and option, and some people can be plenty happy with just about anything. For my stuff, I'd rather not spend as much as I do, but I sure hate the extra weight of other choices.

One of the items that was on my never-to-own list was the integrated canister stove put out by JetBoil.  Sure it was a very efficient cooking system, but it was also costly, had a lot of parts, had a tall profile which I felt was unstable, didn’t allow for interchangeable parts from other manufacturers, and of course, it was far heavier than what I was carrying.

I had always been plenty fine with a variety of stove options.  Whether it be a converted cat food can alcohol stove, a lightweight esbit stove, or the Monatauk Gnat titanium canister stove which I wrote about previously, all were lightweight, inexpensive, small, functional, and plenty sufficient for my needs.  For those wondering, I usually carry the Titanium Sidewinder System, part of the Caldera Cone product line, offered by Titanium Goat (www.titaniumgoat.com).  The beauty of this system is that I can use it with esbits, alcohol or even burn natural resources which is truly wonderful and allows me to avoid worrying about fuel options.  It is also a great windscreen, a stable pot stand, and packs up into a very small package.  It is very efficient and burns hot for the simplicity of the stove.  The downside is that it isn’t as quick to boil water as I’d like.  Additionally, I’ve had problems lighting esbits on occasion.  Also, sometimes I prefer not to carry alcohol and many times (especially in the rain) natural resources aren’t available or I just don’t want to waste the time to collect them.  This leaves me longing for something a little more resourceful, at least some of the time.

For those of you who follow Backpackinglight.com, they had an article recently with comments from Dr. Ryan Jordan (CEO/Publisher/Instructor) which focused a great deal of attention of the JetBoil Sol Ti, a titanium one-person cooking system.  After reading the specs and performance, better understanding its usefulness, and acknowledging that at times I’d like something that works a little more efficiently and reliably, I decided to pick one up.  This system runs about $149, but through a handful of sales I was able to snag one for under $100.  You can read more about it at http://shop.jetboil.com/index.php/sol-cooking-ti.html

I’ve had mine for about 9 weeks now and I can honestly say the system is pretty intriguing.  I like the fact that everything, to include the fuel canister, canister legs (for support), stove, supplemental pan-cooking attachment, spoon, lid, cozy, and a separate bowl all fit together in one 4”x6” system.  The pan attachment is a nice option for cooking something other than a boil-in-the-bag meal and the lid is nice because it helps keep things toasty and even has holes for a strainer.  It also comes with a unique integrated igniter, although I wouldn’t wholly rely on it as it can fail.  Below are the weights:


POT – 108g/3.8oz
LID – 18g/.63oz
COZY – 14g/.49oz
BOWL – 33g/1.16oz
STOVE – 98g/3.45oz
LEGS – 27g/.95oz
PAN ATTACH – 35g/.95oz
TOTAL – 337g/11.88oz

I carry only the pot, cozy, and stove (with tin foil lid) – 220g/7.76oz.  For comparison, the 900ml Sidewinder system mentioned above comes in at 176g/6.20oz….37 grams can be subtracted if tin foil is used instead of a titanium lid just like 18 grams can be subtracted from the JetBoil.  Both are weighed without fuel and I can’t hide the fact that a fuel canister has a some weight and zero function once it runs out of fuel (just like an alcohol bottle).

I’ve used this system in a variety of temperatures and conditions (wind, rain, down to 25 degrees, etc.) and it performed very well.  I quickly learned how this system got the name “Jet Boil” as it takes just one listen to the burner firing away at an impressive volume to know that something is happening.  Users of titanium know that it heats quickly, often unevenly, and isn’t the best option for finely cooked meals.  In fact, using it just to boil water is usually a safe bet which is what I intend to use it for unless I get overly creative and decide to bring a pan and cook something a little more worth eating.  

I was very impressed with the fact that I could boil water in slightly over 2 minutes in every situation which I find quite amazing.  Considering my esbit, alcohol, and natural resources generally take 8 to 12 minutes in any other stove set-up I own, I realized how perfect this system could be for my wife and I, groups, or long-term hikes as fuel consumption is less because it boils so quickly.  I think it will also be a nice option in Virginia winters which I make a specific reference to “Virginia” because our temperatures rarely push less than teens which is even rare.  Those in sub-zero temperatures would likely want to consider another kind of stove and propane option instead of butane.  The smaller canister to integrate into the pot is nice as it means less air as it empties and compression isn't so impacted.

What I don’t like about this system is several things.  First, it remains expensive and I continue to not like the fact that there are several parts.  I think it is over built to a certain degree too.  My biggest gripe though is how the pot sits on the stove.  The user essentially needs to line up holes and turn it to a fixed point so it is seated securely.  This is done principally for climbers who actually cook with the system while hanging it.  The problem is that the seating isn’t smooth.  In fact, it is clumsy.  Numerous times I found myself fighting with the stove to get it on, and more importantly, off.  In the right conditions I could definitely picture spilling the boiling contents in my lap or dribbling it on my hands or gloves.  Not good and I see no way around it with the current design.  I also don't like the little legs that are supposed to fit on the canister.  For whatever the reason, I can't figure it out.  For the bigger canister, the legs are not necessary.  For the smaller canisters. like those needed to fit inside the pot, it's clear they could be useful.  The neoprene wrap around the pot is helpful for keeping hands from getting burned, but it could stand to be more robust as it is too wispy and stretchy under the weight of a full mug.

So it is worth it, maybe I suppose at least in certain conditions.  By having it, I feel like I now own a piece of the Mr. T starter kit for more conventional lightweight backpacking.  As such, let's call it Option 2 taking a backseat to my other stoves except for perhaps in winter.

Wednesday, November 30, 2011

Big Boy Replacement for the R1 Hoody.


The R1 Hoody.  Ever heard of it?  It is a product made by Patagonia which is often the go-to baselayer for late 3 season and 4 season activities.  It became particularly identifiable when Richard Nisley mentioned it during a nice instruction he offered on the BackpackingLight forums where he addressed ideal clothing layering systems for backpackers.


My experience with Nisley’s research and findings has been very agreeable.  His insight into how wind and head gear affect thermal comfort, especially when coupled with a windshirt, really offers great insight on lightweight and effective clothing systems.  Fear of being cold is an emotion many people who enjoy the outdoors have experienced at one time or another and understanding that the answer does not always require you to be dressed up like an Eskimo is enlightening.

The problem with the R1 Hoody is two fold.  First, it is $149.  YIKES!  And second, especially when you spent a little too much time in the microwave like I did before I was born, the R1 Hoody is no longer made in sizes beyond XL.  Talking with Patagonia, they indicated even their fall 2012 line will not have an XXL despite offering it in their initial runs.

As a result, I needed to find an alternative to the R1.  So who did I ask for guidance after my own research fell flat?  Well, Richard Nisley of course.

Nisley offered two suggestions.  The first was the E.C.W.C.S Hoodie from Cabelas and the second was the MEC T3 Stretch Hoody.  

Needing something to cover my 6’5” frame (a “tall” version), I elected to go with the Cabelas offering.  The E.C.W.C.S Hoodie, or “Extended Cold Weather Clothing System”, was originally developed for the U.S. Military and U.S. Special Operation Forces.  I have no idea which product came first (Patagonia or Cabelas), but the Polartec Power Dry fabric and design look the same to me.  To anyone lacking affluence, a great perk was that this item was $79 in an XXL tall (it is $69 on sale now) which is a whopping $70 less expensive than the Patagonia (or if you need to explain it to your spouse, “half price”).  It is also made in regular sizes and non-tall versions.  No matter how you shake it, it is simply a far better deal.  If you need to see "Patagonia" on your chest to feel good about yourself, I suggest getting a marker and being as neat as possible.

So what’s the big deal?  Well, this is a very unique garment.  It is constructed to be a next-to-skin baselayer offering superior wicking action.  When you look at it closely, it looks like a little checkerboard with high spots and low spots.  When holding it up to a light, certain areas allow more light through than others.  The beauty of this design is that it will keep you warm and allow for great moisture management because there is still circulation which is really the only chance you'll have to dry your garment.  Because it comes with a hood, it can be used to greatly increase your comfort level when you stop or when you get cold.  Being able to regulate your thermal comfort without digging through your pack for a hat or something to supplement the system is wonderful.  Add a windshirt and there is no reason why this combination shouldn’t keep a moving hiker plenty comfortable in nearly any cold/colder conditions.  It is my go-to cold/colder weather garment of choice.  All this, and it feels more like a fleece or sweatshirt than the standard scratchy synthetic feel so common with capilene.

If you’ve ever struggled with staying warm or keeping your clothing dry in colder temperatures, this is truly a great innovation.  It may also enable you to forgo “sleeping clothing” as you may arrive at camp entirely dry and comfortable.  For bigger guys, it is nice to finally have an option that everyone else already had.

While you're shopping at Cabelas, pick up a nice Polar Weight Fleece hat.  It's a great weight for winter and Cabelas currently has a sale on a hat/glove combination for $10, or $15 off from the normal $25 price.  Well worth it.

Wednesday, November 23, 2011

Cuben Vest + Sleeves


The cuben fiber vest I described in an earlier blog entry (http://jolly-green-giant.blogspot.com/2011/09/undesired-sabbatical.html) drew a lot of private conversations.  Oddly enough, most people were fairly accepting of a non-breathable, noisy and costly fabric that looked fairly dorky by most standards.

For the most part, people wondered how I used the vest in cooler temperatures with the primary question being whether I used another jacket to supplement the fact that a vest has no sleeves. 
 
Well, when I originally envisioned this vest, I planned on making it myself and part of the plan included detachable sleeves and a hood.  After injury and an assessment of my sewing skills (which were lacking), Ben from GooseFeet (http://www.goosefeet.webs.com/) was kind enough to take on the project.  I’ve enjoyed working with Ben on a couple projects and each time he impresses me with his customer service, willingness to push the envelope, and quality of his products.  Of no surprise, in addition to making the vest, he also made a pair of detachable sleeves.  They were constructed in a manner similar to those sold by Jacks ‘R Better, which a previous evaluation proved they were too small in length and width and also weren't offered in cuben. 

The sleeves are stuck together with a piece of elastic strapping.  One strap crosses my back and the other crosses my chest with the tension of my arms in the sleeves pulling everything together and air-gaping the vest.  The cuffs have a small piece of shockcord to help ventilate the sleeves as desired.  It works wonderfully and the vest and sleeves look seamless together.  So in a nutshell, when I get cold, I simply put on the sleeves.  The sleeves are also a nice option as leg warmers or to wear with convertible quilts that have a head hole.  Think multi-use gear folks.
 
Cost of the sleeves, $100.  Weight, 3 oz.  Construction is 2 oz of 900 fill-down with cuben fiber fabric.  In short, sleeves plus vest are a 10 oz super-heater that easily beats anything on the market for a 3+ season jacket and could go easily into winter season with attention to a decent baselayer and layering with a windshirt and rain jacket.  I've used it in the teens and 20's and can say easily that it is the warmest jacket I own, even more than the New Balance Fugu.  This is likely due to the fact that it acts as a vapor barrier. My armpits need ventilation when I'm wearing the sleeves and the vest even when I'm not moving, so I simply pull out the sleeves a bit.  Other jackets are more comfortable to wear because of the breatheability issue, but this is a multi-use gear that does exactly what I wanted it to do.

And for those wondering about the hood, well, I saved some money by using a down balaclava hood from Nunatak USA which I had previously made to fit my New Balance Fugu jacket.  It adds 3 oz to the mix….or a total 12-13 oz winter jacket option in size XXL and tall.  Imagine that!  The balaclava is extremely warm though and often I opt for a lesser fleece balaclava, beanie, or hat.  For you average sized folks, I’m guessing you could do this set-up for 9 oz or less.  Yes, it isn’t cheap, but it sure it nice, warm – and light!

Wednesday, November 16, 2011

(Tap Tap) Hello. Is This Thing On.....?


Well, I’m back.  After knee and hand surgery, crutches and a cast, I finally have my appendages back.  They aren’t 100%, but functional, and I’m working on trying to regain the mobility and dexterity I had previously.  Hopefully these problems will be a distant memory in the near future although I know surgeries of this scope have a way of being remembered.

Although I wasn’t blogging during my sabbatical, I was testing gear, reading a lot of backpacking articles and blogs, enjoyed several YouTube videos, limped my way through a few day hikes, enjoyed several overnights with my family, and otherwise had time to better engross myself in the backpacking industry. 

With that said, I’ve got several items of tested gear and other comments which will be posting weekly for the next several weeks starting next week.  THANKS (!!!) to everyone for sticking around.

Below are some videos I came across during my sabbatical that I thought were worth watching for your entertainment.

Most lightweight backpackers have heard of Mike Clelland(!) through his books, amazing illustrations, or knowledge as a NOLS instructor.  Well, he’s started putting practical tips on YouTube which really help bring home his techniques in a unique way.  He has several available, but you can start with learning about layering your clothing system http://www.youtube.com/watch?v=_J4D3AHzlxQ which I think is one of his better videos..  His “dinky stuff” and “water treatment” videos are also well done.

I’m not quite sure how I came across the Intense Angler, although he appears to be quite popular on YouTube.  Nonetheless, I’ve enjoyed his grassroots and humble comments about lightweight backpacking and do-it-yourself gear even with his long-winded nature.  Like many of us, I like the fact that he’s a guy just trying to learn what works and do his best without a ton of advertised degrees to his name to gain him some kind of notoriety. http://www.youtube.com/user/intenseangler#p/u/38/FdeQ_MxXLOk.

Hendrik with Hiking In Finland (www.hikinginfinland.com) posted a great video entitled “Almost There – The John Muir Project” http://www.youtube.com/watch?v=kukVNtyNDCw which I enjoyed watching during my downtime.  It was very well done and truth be told I wish it were longer.  I was actually hoping it was part of a longer DVD series.


Erik the Black’s Backpacking Blog (http://blackwoodspress.com/blog/5521/10-ultralight-backpacking-foods/) has a great article on the Top 10 foods he brings backpacking which pack a caloric punch and are lightweight.

Until next week, happy backpacking,
JOLLY GREEN GIANT

Friday, September 16, 2011

Undesired Sabbatical

This is going to be my last blog entry for a couple months. I recently tore the meniscus in my knee and had surgery. With stitches still in, I’m waiting to see if I can walk normal again. If that weren’t unlucky enough, I followed up my surgery by seriously breaking a bone in my hand just 5 days later which X-rays showed was weakened because of a tumor in the bone. I need to have invasive surgery to remove the tumor which will include the cutting of a tendon to get to it, a bone graft, and 6-8 weeks in a full hand cast. As a result, I simply cannot type without the hunt-and-peck method which I’ve decided is entirely too cumbersome. This little entry alone is extremely time-consuming and mentally draining. With that, I wanted to quickly offer the next three things I was going to discuss in short format with little context. These are each nearly unknown gems in the lightweight backpacking industry.


What? - Cuben Fiber Vest

Where? Not advertised. Custom made by Ben at Goose Feet (http://www.goosefeet.webs.com/)

Weight? Mine is 6 oz, but yours could be under 4 oz. It varies because you can customize your material, size, amount of insulation, and frills (collar, pockets, full or half zip, etc.). Cuben saves you about an ounce.

Cost? $120-$220, varies because you can pick different material, size, and amount of insulation, and frills (collar, pockets, full or half zip, etc.). Mine is cuben, 4 oz of 900 down insulation, collar, full zip, adjustable waist, and adjustable arm holes.

Pros? Warm, warm, warm. Material is waterproof – think back sweat protection, rain protection, and double-duty as a vapor barrier. Packs small and is extremely lightweight. Vests are extremely versatile and work well with layering.

Cons? A bit noisy, a bit dorky looking, expensive. Imperfect manufacturing impacting aesthetics, not function.

Comment?  Best piece of apparel for backpacking I own, hands down.


What? Width and Height Tapering and Insulated Sleeping Pad

Where? The Taperlite is advertised, the insulation is not nor is the fact that size can be customized. Custom made by Bender at Kookabay (http://kookabay.com/taperlite.html).

Weight? 5.5 oz, Varies because you can customize your size in all directions and the type of insulation

Cost? $70, Varies because you can customize your size in all directions and the type of insulation

Pros? Light for an inflatable, insulated for warmth, custom size makes all the difference.  Mine is wider than anything on the market.

Cons? Heavier than foam and prone to puncture.  Costly.

Comment? Best choice I made for a better night of sleep. Custom size makes it perfect. Keep in mind, it even tapers in height, so legs have no drop-off from the transition from the pad to the ground or other insulation. Get the size and insulation you want and sleep soundly!


UPDATE (23 Feb 2012):
Regrettably, I can no longer recommend or support Kookabay.  In late 2011 and well into 2012, numerous customers came forward to say Kookabay (Ben Neubrander) had defrauded them.  Concerns included taking money for products never provided and providing products with bad valves which were returned for repair and were never repaired (or returned) or refunded.  I was one of those customers.  I attempted to contact Ben numerous times of the last 5 months and he simply did not respond.  Others experienced the same.  He eventually shut down his website and his PayPal account.  It was reported that he had gotten burned out, and just simply walked away without fulfilling his obligations.  Ben had a great product and was plenty fine to deal with when he chose to manage his company responsibly.  It's a shame he experienced some kind of personal hardship, but he did not handle it well.  Simple correspondence with his customers and extended timelines would have likely made everyone happy.  Instead, he just chose to cut and run.  I personally wish him the best and hope to see his products return somewhere, someday, somehow.


What? Lightest Canister Stove – Monatauk Gnat

Where? Web search (http://www.moontrail.com/monatauk-gnat.php)

Weight? 1.6 oz

Cost? $42-70 depending on where you buy it

Pros? Lightest canister stove on the market, small, durable, adjustable flame, well made, efficient enough.

Cons? May not perform great at high altitude and may not be as efficient as others with regulators.  It also does poorly in windy conditions and you may be forced to use some kind of windscreen which is highly discouraged for most canister stoves.

Comment? Best choice I made for a canister stove as it saved me a tremendous amount of weight from other canisters I own…although I’m still more likely to use Esbit or an alcohol stove.


Best of luck to everyone during what is no doubt my favorite hiking season which I will miss. Thanks for sticking with me thus far and hope to see you in the near future. Please use the resources on the right which will continue to contain updates on other excellent blogs.


JGG

Wednesday, September 7, 2011

New Cuben Shelter

I hinted at it in an earlier blog about Trail Days 2011 and now I'm happy to report that after 5 months I'm the proud owner of a cuben fiber tent.


Over the last 10 years with a greater focus in the last few, cuben fiber has taken the lightweight backpacking industry by storm. It is essentially a sandwich of mylar (plastic film often used by drafters and others) with Dyneema threads running through it. Dyneema is similar to Kevlar (fibers used in bullet-proof vests) in that both are ultra high molecular-weight polyethylene which have extremely long chains at the molecular level. The longer the chain, the better the load transfer within the fabric. The result is an extremely tough and lightweight material. It is waterproof, low-stretch, and comes in a variety of colors. The one downside - it is extremely costly.

I had been on the lookout for a full cuben fiber shelter to supplement my two other favorite shelters: Gossamer Gear SpinnTwinn Tarp (for non-buggy seasons) and the Z-Packs Hexamid Twin Shelter (for buggy seasons). Both are under 10 ounces and are amazingly spacious. I wanted something a little more robust, something that would be more versatile in bad weather, and something I could likely use year round (including minimal snow situations).

Comparing the few cuben shelters on the market was fairly easy as there weren't many. Options included tarp-like shelters with clip in net inserts and some kind of vestibule which I thought was too finicky and I didn't like crawling on my belly to get in and out. Terra Nova had an interesting option in the Laser Ultra 1, but it was a little too small for my big body and it just wasn't worth being uncomfortable for the money. Six Moon Designs came out with a cuben shelter called the Skyscape X which I mentioned in my Trail Days 2011 blog entry. I personally was not thrilled with the robustness of the roof support, lack of defined bathtub floor, or the fact that the ceiling seemed to dip on my shoes and face despite it being fairly long. As I understand it, there have also been delays with delivery and additional tweaks to the design, specifically reinforcing the seams.

So what did I end up with? Well for me the choice was fairly straightforward as the it was the only option that met all or most of my criteria - the Lightheart Gear SoLong 6 (http://www.lightheartgear.com/). As far as I know, I'm the first owner of the cuben version of this tent.


I wasn't in a huge rush for my tent, so Judy (owner of Lightheart Gear) and I had numerous discussions over the last several months to hammer out details I wanted to change. In fact, customizing the tent exactly as I wanted it was likely one of the most critical factors in who built me a cuben tent. Judy was willing to do just about anything within her skill-set and resources which was tremendously helpful. As a result, custom ridge vents were added. Micro-adjusters were added to the carbon pole corner struts (similar to Tarp Tent). The struts themselves were installed in a more robust manner and different weights of cuben were used. Toggle hardware which holds doors and windows open was improved and made smaller and lighter. The non-entrance side of the tent was given a second zipper to open the whole other side for views and ventilation if needed. Loops were attached to the top of the peak and the interior pole support was velcroed in place to enable me to hang the tent from a tree and retain structure shape if I break a trekking pole or decide not to bring them. I wanted the floor to be white so I could more easily spot things without an abundance of light. I wanted the canopy to be green or some kind of stealth color so I could blend in despite the fact that I like bright colors to help lighten the mood (more and more studies are claiming that bears are attracted to bright colors...consider this fact in your apparel choices). It was also important to me that the seams be taped and I liked the flexibility of using different weights for the canopy and floor.  I've learned to roll the tent in such a way that it is a little bigger than the bag for my SpinnTwinn tarp and smaller than my Six Moon Designs Lunar Duo.


On my scales without a stuff sack or stakes, the tent weighed 21 oz. This is slightly heavier than some of the other cuben shelters I mentioned herein, but this is far bigger, with many more functional frills, and it is sturdy and stable enough for me to feel plenty confident that it will weather a good storm. Most of the weight comes from the cuben floor which wraps up around the corners to form an 8" (!!!) bathtub floor. I have never seen any similar tent offering such great protection from ground water. The exterior canopy hangs over the floor with a significant gap, so ventilation is vastly improved from other designs as air has no choice but to circulate. Consequently, it also came in green...which is exactly what I wanted and especially important if your trail name happens to be Jolly GREEN Giant. A full coverage tent enables me to leave certain things at home, whether it is a bivy or netting, etc. In short, it allows me to leave some gear behind and come out very close to the same weights I'd get if I used a tarp (within 3-5 ounces depending).  This tent is extremely roomy which can't be understated.  I'm 6'5" and I can sit up or lay down and not come close to touching the canopy or sides.  I can easily change my clothes and do just about anything I want which in the past I've reserved for bigger shelters.  It is, by far, the most roomy single-person fully enclosed shelter I've ever been in and pictures don't do the interior space justice.  The space of this tent is a luxury, not something that needs to be squeezed in to conform to some lightweight mantra.

In the end, I got exactly what I wanted - a lightweight shelter with plenty of space and very stable. The more I play with it, the more I like it and the more I appreciate the quality and function. It has quickly become my favorite tent. Now don't get me wrong, it was extremely expensive, more expensive than any shelter I've ever purchased. Fortunately selling off several unused pieces of gear made this purchase possible.

If you're in the market, and especially if you're a bigger than the average person or just want a 1+ shelter option, definitely give the Lightheart Gear SoLong 6 a look. In silnylon, this shelter is an affordable 26 ounces at $275.


Thursday, September 1, 2011

THANKS!

In recent weeks, acknowledged readership of my blog has surpassed 200. Since inception, pages have been viewed over 116,000 times to include 9,400 views just last month alone.

This blog simply would not exist without you, plain and simple, and I'd like to thank each of my readers for both stopping by and for sharing their own insights. I have learned as much as I have put in and hope you have walked away with something too.

Once again I'd like to draw your attention to the right side of my blog ------> where you'll find numerous cottage manufacturers and blogs, all of which are on my radar. Give them each a look and I'm guessing you'll find some enLIGHTenment.

Once again, THANKS to everyone!

Teaser for Next Week: First look at my new cuben tent - one which I don't believe anyone else owns - yet.

Wednesday, August 24, 2011

Top 3 Lightweight Lighting Options


Ever hiked at night? Some find it exhilarating, some find it scary. I suppose I've shared both emotions which seem to be heavily influenced by whether I'm solo or with others.


If you've hiked at night, or had a need for a functional light to help you set up your shelter, hang a bear bag, or otherwise navigate in a foreign place....and you're of the lightweight persuasion, this article is for you.


Right off the bat I'll preference this whole article is geared for lightweight backpackers which means I'll skip mentioning the wonderful products offered by Petzl and others. There are many outstanding headlamps on the market which can turn light into day, but I'm looking for "good enough" in a lightweight package. To me a good headlamp must cast a decent and functional beam with dispersion appropriate for hiking, it must be lightweight and allow me to be hands-free, it must be fairly durable in both construction and protection from outdoor elements, and it sure would be nice if both beam, intensity, and color could be adjusted. After a lot of study and practice, below are my top 3 suggestions - none of which are perfect, but all of which are intriguing. For comparison, the Petzl Tikka 2, a very popular mainstream headlamp, weighs 81 grams and costs around $40. The heaviest item on my list is 29 grams and costs $20.


First up, the Photon Micro-Light II ($12, 12g). Before being introduced to this light, I was very skeptical - standoffish in fact. It was simply too small, too lightweight, and too inexpensive...or so I thought. Since embracing it, despite always trying to find something better, I keep returning to it. Simply, it's just a great, lightweight, and functional option. It runs on a CR2032 battery which is very popular.


Second, the Black Diamond Ion ($20, 29g). This little light has been around for awhile and keeps getting improved. What I like about it is that it is a fully functional headlamp in the sense that it is meant to be worn as a headlamp instead of needing some gimmicky way to attach it like the other two lights mentioned herein. The mount allows for it to tilt up and down and it has two settings for low and high. I like that it comes in different colors. Like anything I pull out of my pack, I want it to be bright so I don't lose it. It runs on a 6-Volt battery, which although popular, may not always be available in trail towns.


Lastly, the ITP A3 EOS Upgraded Edition ($20, 26g). This replaced my Fenix LDo1, which superhiker Andew Skurka liked so much. The ITP A3 EOS Upgraded Edition won out in my book because it was lighter, far cheaper, more compact, came in bright colors, had more features, and had better distribution of light. Like other similar small flashlights of the same shape, I needed to rig it to something to wear it on my head. I used the headstrap for my Petzl eLITE which I've since retired and no longer recommend as there are just better options available.


Another thing I like about all three, for which the Photon doesn't have a choice as it only has one intensity, is that when I turn them on it defaults to the lowest setting. I get irritated when I pick up a light in the middle of the night and next thing I know I think I'm having a religious moment as my shelter becomes the lighthouse of the forest. It saves unnecessarily wasted battery too.


Originally when I thought of writing this article, I planned on offering a definitive response as to which one I thought was best. Several times I stood in my darkened basement or on a trail behind my house after the sun went down and I came to the decision that I really can't come to a one-option decision. Each light is wonderful in its own right and it really depends on user preferences. For example, some want several light modes, some want to see far, etc. So you can compare some of the more important features, I made the somewhat helpful chart below.


Some of you may be focused on Lumens, for which the ITP A3 EOS Upgraded Edition is the brightest, but keep in mind the beam would only last 55 minutes on this setting (80 lumens). Yet the Black Diamond Ion on its highest setting would last for 8 hours (12 lumens). The humble Photon Micro-Light II which only has one setting would last for 12 hours and it's the lightest and least expensive (4.5 lumens). So the question if this is a concern is how many lumens do you need to have to feel comfortable. To me, 4.5 is plenty for night hiking, but I'd also like for a higher setting to see things in the distance if needed and a lower setting for reading. It would also be nice to have a red beam to save my night vision, but none of these have this option (the Photon can be purchased separately in red beam as well as other colors). Regardless, you get the point and I encourage you to take a look at each of these lights as they are all truly wonderful options.


Wednesday, August 17, 2011

Twigs and Berries, a Conversation to Avoid Neglect


Yes, if I'm willing to have a multi-part series on the value of a good poop-scoop, then it's probably no surprise that I have no shame in addressing the value of good underwear too.


If you haven't been victimized by chaffing, you're really missing out on a wonderful experience of pain tolerance. Chaffing, specifically thigh-on-thigh chaffing is a very unpleasant experience. In fact, it can ruin a hike. Despite being armed with Hydropel and wearing ExOfficio boxer briefs which I thought were sufficient, a couple summers ago I got the pleasure of feeling what I described as being bit in the crotch by a rabid Rottweiler which took a couple weeks to heal. Simply, it hurt to walk and there was really no good way to deal with it other than by being patient and sitting quite patiently in an exposed and vulnerable position.


In the end, for my situation anyway, the most help I could gain to ensure it didn't happen again was to be more selective with my underwear choices. For this reason, I'm going to propose three solutions. First, as mentioned by Ray Jardine and others, simple spandex or polyester "biking" shorts can do double duty as both shorts and underwear. If you can find some treated with silver, you'll gain better anti-microbial properties. Second, as I mentioned in another blog, I've also had some luck wearing very wispy shorts with interior netting for support. The ventilation helps tremendously and as long as you can keep the fabric from bunching up it might just be a good option for you. That leads me to my third point, proper fitting underwear.


As I mentioned, in the past I used ExOfficio snug-fitting boxer briefs which are pretty common in hiking and traveling circles. For me, they simply didn't work well enough for me to keep using them. I then moved on to a pair of Under Armor boxer briefs which were far more robust, more snug fitting, and did their job better. The problem is they run $20-$30 per pair. Simply - this is ridiculous.

For quite a while I've been searching for something on par with Under Armor. About six months ago I stumbled across what I would later learn to be their replacement. Unfortunately, I wasn't able to find them again until very recently and I elected not to blog about them until I was able to say they were still being made and could be found by my readers.


So here's the best option I could find...which I prefer over Under Armor. They are significantly cheaper, slightly lighter, and craftsmanship and materials are on par. Yes, and they do the job. Under the STARTER brand name and only available at Walmart, check out the Active-Pro Performance 6" Boxer Brief. They are just $8.88, come in a variety of sizes, and honestly, they are the best underwear I've owned for backpacking as they are just as robust as UA, but just slightly thinner which is helpful for quick drying. Here's the thing....you can't find them online and I've learned that some Walmart stores have them while others do not. Simply, you need to put in the time to try to find them. They exist. Some Walmart's have a huge section dedicated to them while others only have the cotton version.

Butt Paste, zinc, and other baby-related creams go a long way too, but that's for another discussion.  I even know of one hiker who dabs alcohol from cotton swabs onto the irritated area.  He claims it hurts tremendously, but quickly makes all the pain go away.

Happy trails.

Wednesday, August 3, 2011

Getting "Out" From the Comforts of My Own Home

I've been extraordinarily busy for the last several weeks and my outdoor time whether hiking or merely seeing the light of day has been dwindling. Whether it is the strains of working for a new boss who recently hired one of his former employees who strangely enough does exactly what I do (dusting off the resume and hoping for the best) or the fact that I'm pretty sure I tore my MCL, I feel like I'm missing summer. Course, the few times I've braved the day, I was met with triple digit temperatures which singularly made me dream about fall and winter as I camped out in my refrigerator.


When I can't get out, I try to at least keep my spirit alive by checking in on some backpacking or outdoor programming to include many of the blogs listed on the right -------- >. Consequently, I've also watched a few DVD's.


Many of you know about Richard "Dick" Proenneke who quite literally lived in a homemade Alaskan cabin for nearly 30 years. His life during this adventure is documented in a video called "Alone in the Wilderness" by Bob Swerer Productions. His story is really great and he is a product of the World War II generation for which I have a tremendous amount of respect, admiration, and gratitude. For anyone that watched his documentary, they likely learned that he nearly lost his eye in an accident which contributed towards his need to seek refuge in the beautiful wilderness. Likely the thing that stood out most was both his self-sufficiency and his amazing ability to build just about anything, and build it well, with merely an axe, saw, a couple chisels, and some glue. Dick passed away in 2003 and his cabin is now under control of the U.S. Park Service.


Fortunately for those of us that couldn't get enough of Proenneke's escapades, Bob Swerer Productions came out with a sequel (Part II) of Alone in the Wilderness. It can be purchased at http://www.dickproenneke.com/ for $21.95. It has additional footage, shows Proenneke a little later in his life and a little more hardened from the environment. He reminded me of a trapper the more I watched his very experienced and mechanical actions, very much the mentality of a lightweight backpacker in the sense that he had only what he needed and was quite resourceful with that.


I also picked up "Alaska - Silence and Solitude" which covered a couple weeks in Alaska with Bob Swerer Sr. and Jr. which was interesting watching their child-like enthusiasm for the wild and their firsthand experiences which attempted to echo that of Proenneke.


I also picked up two backpacking DVD's which focused on the Pacific Crest Trail (PCT). I personally have no desire to thru-hike the PCT principally because of the desert areas, but I do like the scenery of the central and northern parts in addition to watching the exchanges between hikers, gear choices, and just experiencing the trail vicariously.


The first was Wizards of the PCT (http://www.wizardsofthepct.com/) which was narrated and was directed by a backpacker named Jester. The DVD was $20. This was one of those purchases which was a donation to the backpacking community. In my opinion, the footage was shaky and showed the less polished side of backpackers. It was pretty underwhelming in comparison to other backpacking videos I've seen and came with a heavy dose of snarky attitude which I assume has something to do with how Jester got his trail name. Nonetheless, it serves as a nice documentation of his personal experience and surely will entice some.


The second was a series of four DVD's called "Walk", "Still Walking", "Even More Walking", and "Walked" (http://www.walkpct.com/). Although I wasn't thrilled to pay for four DVD's ($45 total) for something that could have been better paired down to just one DVD, the reality is that it is understandable because the narrator and director, a backpacker named Squatch only intended on making a single video. It was his goal to merely bounce around the PCT, talk to backpackers, and get a general idea of the lore of the path so close to his own home. After the first video, it was clear he got the backpacking bug and hiked a 150 mile section as he continued to bounce around and shoot more footage. By the third and following videos it was clear he became a backpacker and continued his trek along the PCT until he finished it. His fourth DVD "Walked" was the best production and quality by far and it served as a who's-who of the backpacker community with appearances from Jester, Joe Valesko (Samurai) from Z-Packs, Disco and Princess of Darkness from the great PCT documentary "The Walkumentry", and even The Onion (one of the first people to yo-yo the CDT along with Francis Tapon (Mr. Magoo) in the same year. I also noticed that ULA-Equipment packs were the most common, followed by Gossamer Gear in a close second, with some people carrying Osprey packs. The production and video quality improved towards the later DVD's and his personality was child-like initially and always inquisitive. I think it represented the "common man's" video of backpacking and serves as a good learning tool. If you decide you want to purchase one, go for the fourth installment (Walked).


I'd also like to take a moment to thank everyone to contributed to the Ultralight A-Z video series mentioned in my last blog. This project was fully funded and you and I can look forward to what will hopefully be a mainstay in lightweight backpacking DVD's.